I was standing at gate C14 in Denver last March, 40 minutes before boarding, hunting through my carry-on for my laptop charger. I did not own a cable organizer bag back then, and it showed. It was in there. I knew it was in there. But it had knotted itself around my USB-C hub, which had wrapped itself around my earbuds cable, which had somehow swallowed a European adapter I did not even need on that trip. I missed the pre-boarding call. The woman next to me watched the whole performance without a word, which was honestly worse than if she had said something. A dedicated cable organizer would have saved me the entire scene.
I carry a laptop, a phone, a backup battery, wireless earbuds, a travel adapter, a USB-C hub, and occasionally a Kindle. That is six to eight separate cable-related items on every single trip. Before I built a real system around them, I was basically playing a game of untangle-the-knot every time I needed anything. The fix turned out to be simpler than I expected: one dedicated organizer pouch, one intentional packing routine, and five habits that take less than ten minutes to set up before any trip. This is the system I use now. It has held up through 14-hour layovers, overnight trains, and the chaos of connecting through Heathrow at 6 in the morning.
The organizer that anchors this whole system: the FYY Travel Cable Pouch
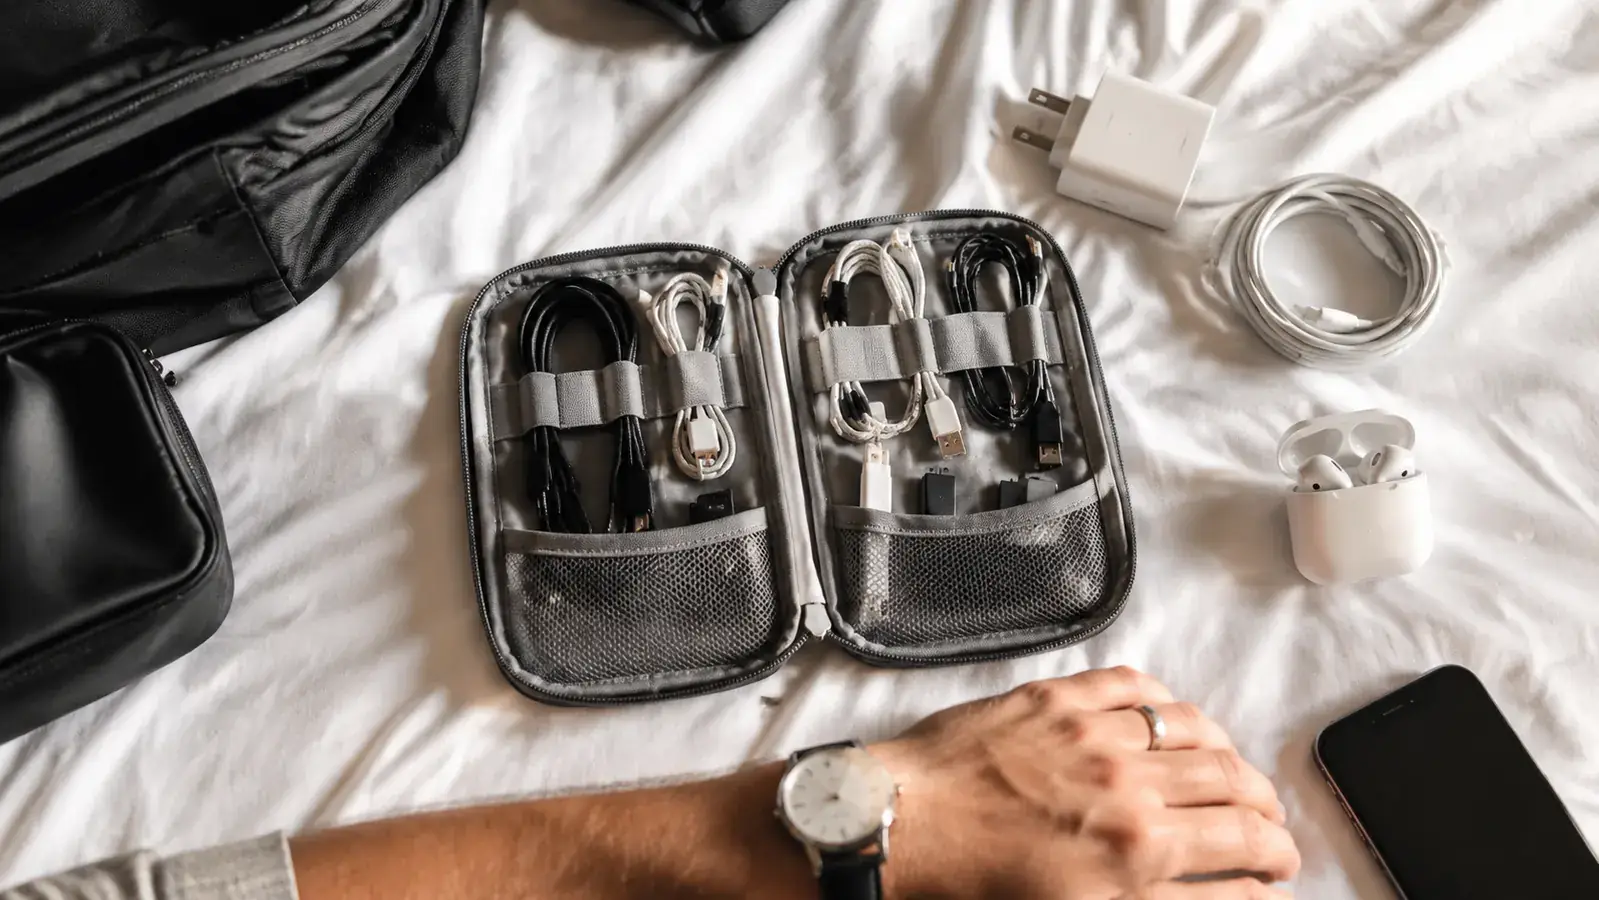
The FYY Electronic Organizer has 38,000+ Amazon reviews and fits inside any carry-on, personal item, or daypack. Multiple elastic loops, mesh pockets, and a zip closure keep everything exactly where you put it. This is the tool this guide is built around.
Amazon Check Today's Price on Amazon →Step 1: Do a Complete Cable Audit Before You Pack
The biggest mistake most travelers make is grabbing cables as they pack other things, tossing each one loosely into the bag as it gets checked off a mental list. By the time you zip up, you have a pile of loose cables with no assigned home, which is exactly how you end up at a gate pulling everything out to find one thing.
Before any trip, dump your cables out on the bed and do a proper audit. Ask: what devices am I actually bringing? What does each device need to charge or connect? Are there duplicates I can leave behind? Most travelers can cut their cable count by a third just by thinking it through before packing. For a long weekend, I bring my laptop charger, one USB-C cable (used for both my phone and my backup battery), my earbuds case, and a universal travel adapter. That is four items total. For a two-week trip I add a second USB-C cable and my Kindle cable. Nothing more.
Write the list down the first time. Once you have the right short list, it becomes automatic on every future trip.
Step 2: Coil Every Cable Before It Goes Into the Organizer
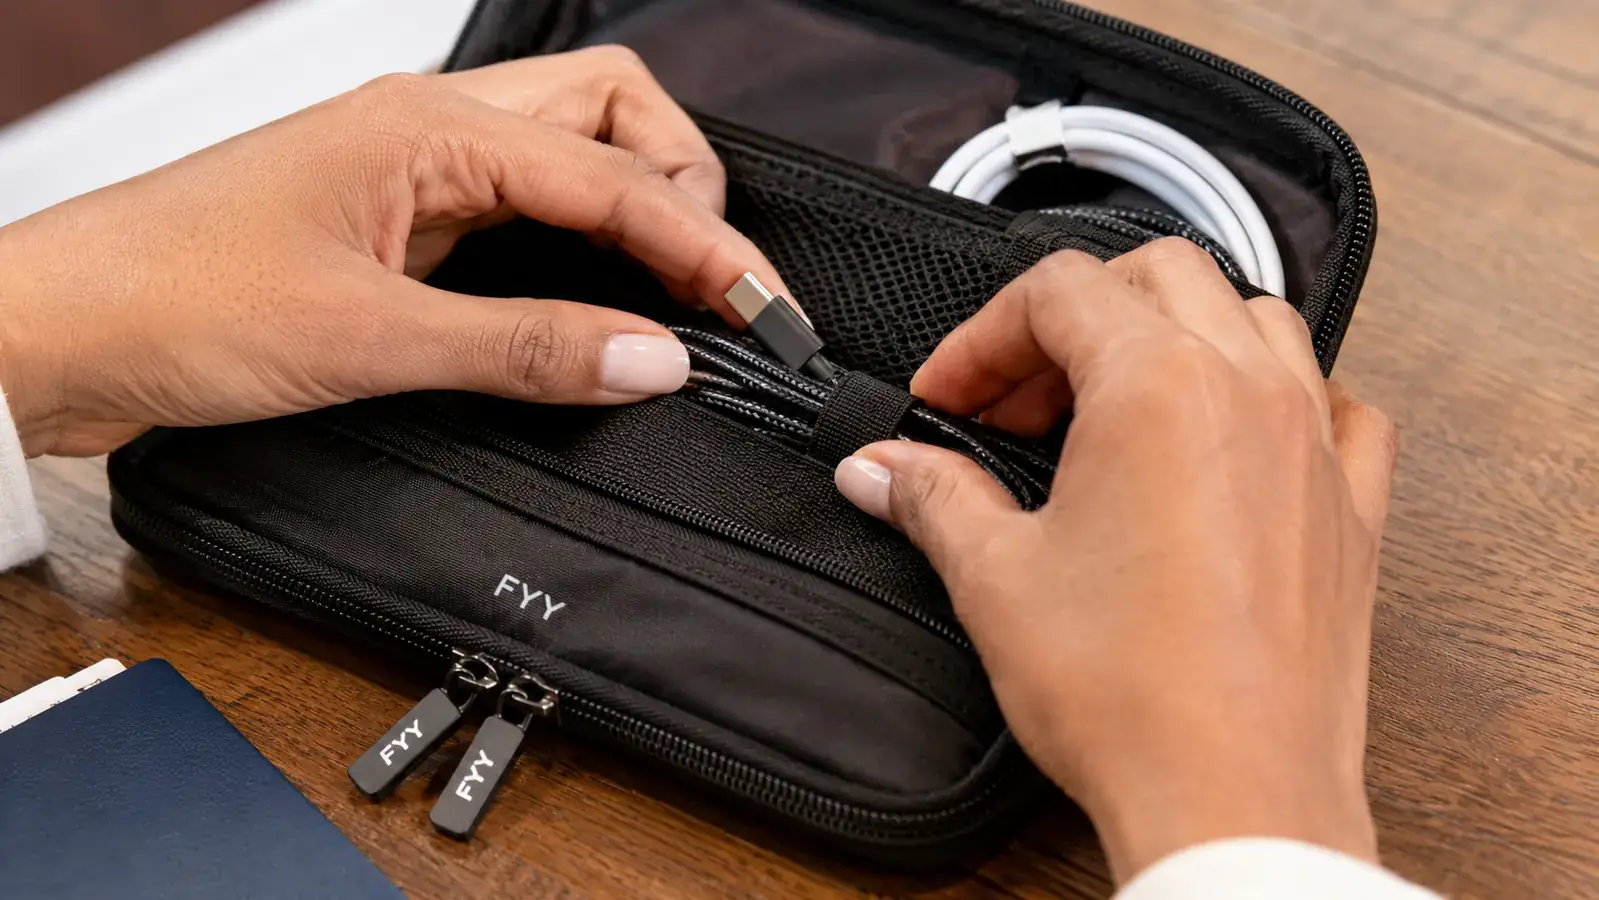
The over-under coil method is worth learning if you do not already use it. The standard way most people coil a cable, wrapping in the same direction every time, creates internal tension that uncoils the second you release it and causes the cables to spring back into knots. The over-under method alternates the direction of each loop, which releases that tension and leaves you with a cable that stays flat and compact.
For shorter cables under 18 inches, a simple figure-eight coil around two fingers works perfectly. Either way, the point is that a cable should be coiled before it touches the organizer, not stuffed in loose and coiled in theory. A coiled cable fits cleanly into an elastic loop. A loose cable works its way under and around everything else in the pouch within about 20 minutes of travel.
The FYY Electronic Organizer has multiple sized elastic loops specifically built for this: the wider loops hold wall adapters and charging bricks, the narrow ones hold coiled cables and earbuds cases. Once I coil each cable and seat it in its loop, nothing moves. I have dropped the pouch, shoved it under airplane seats, and stuffed it into an overhead bag. When I unzip it, everything is exactly where I left it.
Step 3: Assign Every Item a Permanent Slot
This is the step that makes the system feel automatic. Each item in your organizer gets one assigned location and lives there permanently, not just on this trip, but on every trip. Your laptop charger always goes in the top-left elastic loop. Your travel adapter always goes in the front mesh pocket. Your USB-C cable always clips into the center loop. The Kindle cable, if you carry one, always goes in the right-side loop.
When everything has a permanent slot, you stop thinking about where things are. Your hand goes to the right spot without looking. At a hotel desk at midnight when you need to charge your phone before a 5am flight, you unzip the pouch and reach in without turning on the lights. That level of automatic is only possible if the assignments are consistent every single trip.
Spend ten minutes on your first packing session deciding what goes where, then write it down on your phone's notes app. After two or three trips, you will not need the note. The assignments will be as automatic as knowing which pocket your phone is in.
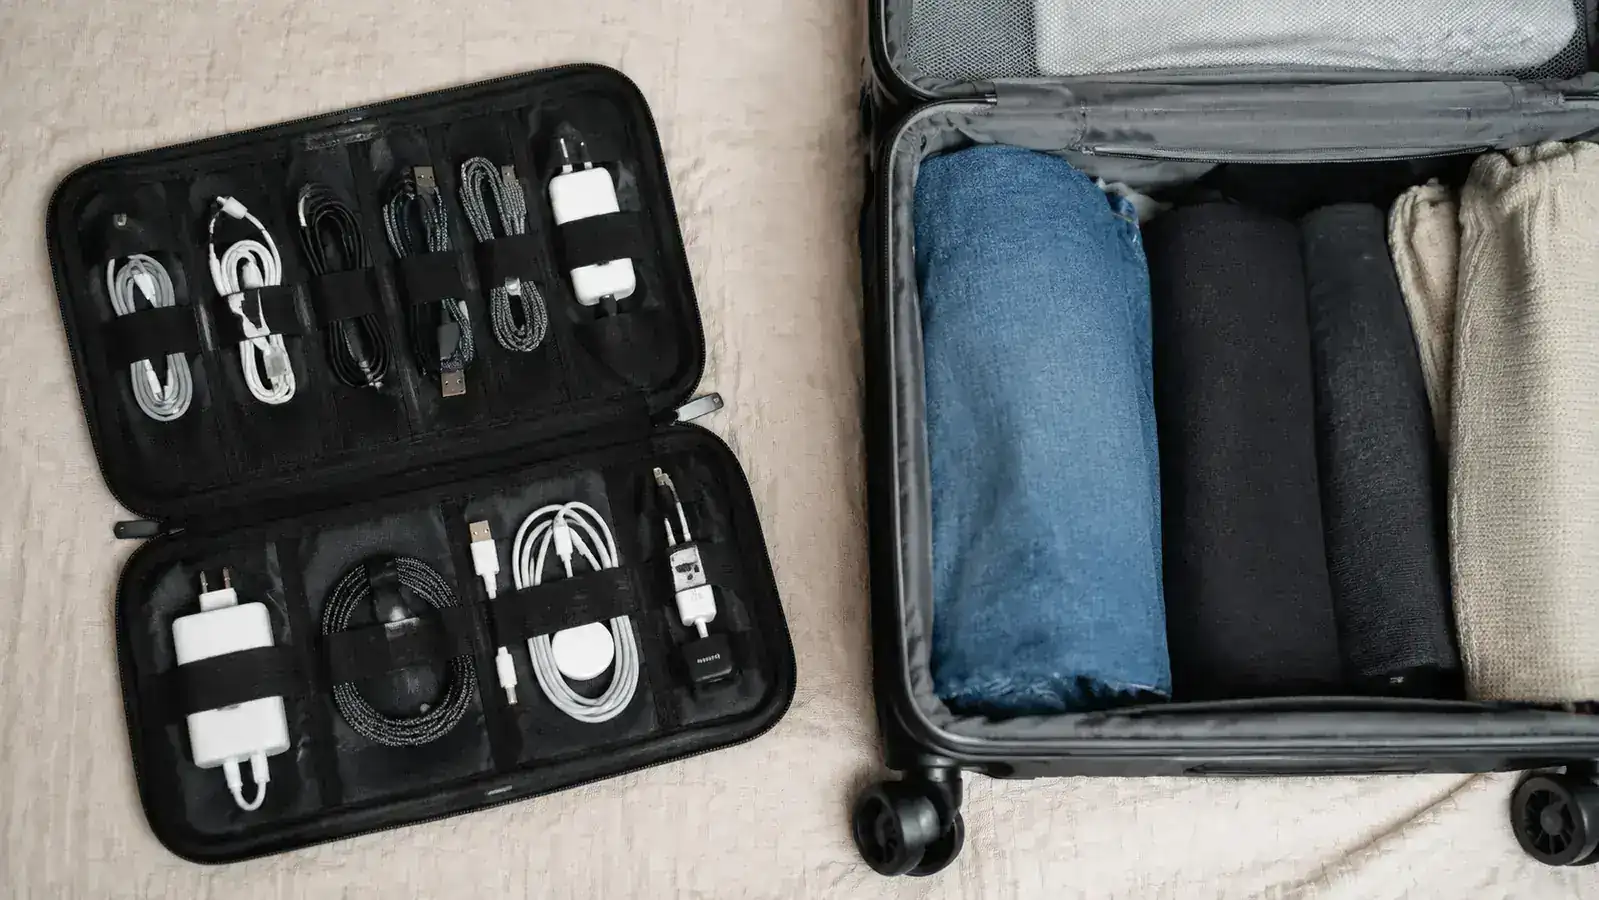
Step 4: Pack the Organizer on Top and Access It First
Where the cable organizer lives in your bag matters as much as what is inside it. Most travelers make the mistake of packing it somewhere in the middle of a carry-on or buried under clothes in a personal item. Then, when they need a cable at the airport, they have to unpack half the bag to get to the pouch, which defeats the entire point of having an organized system.
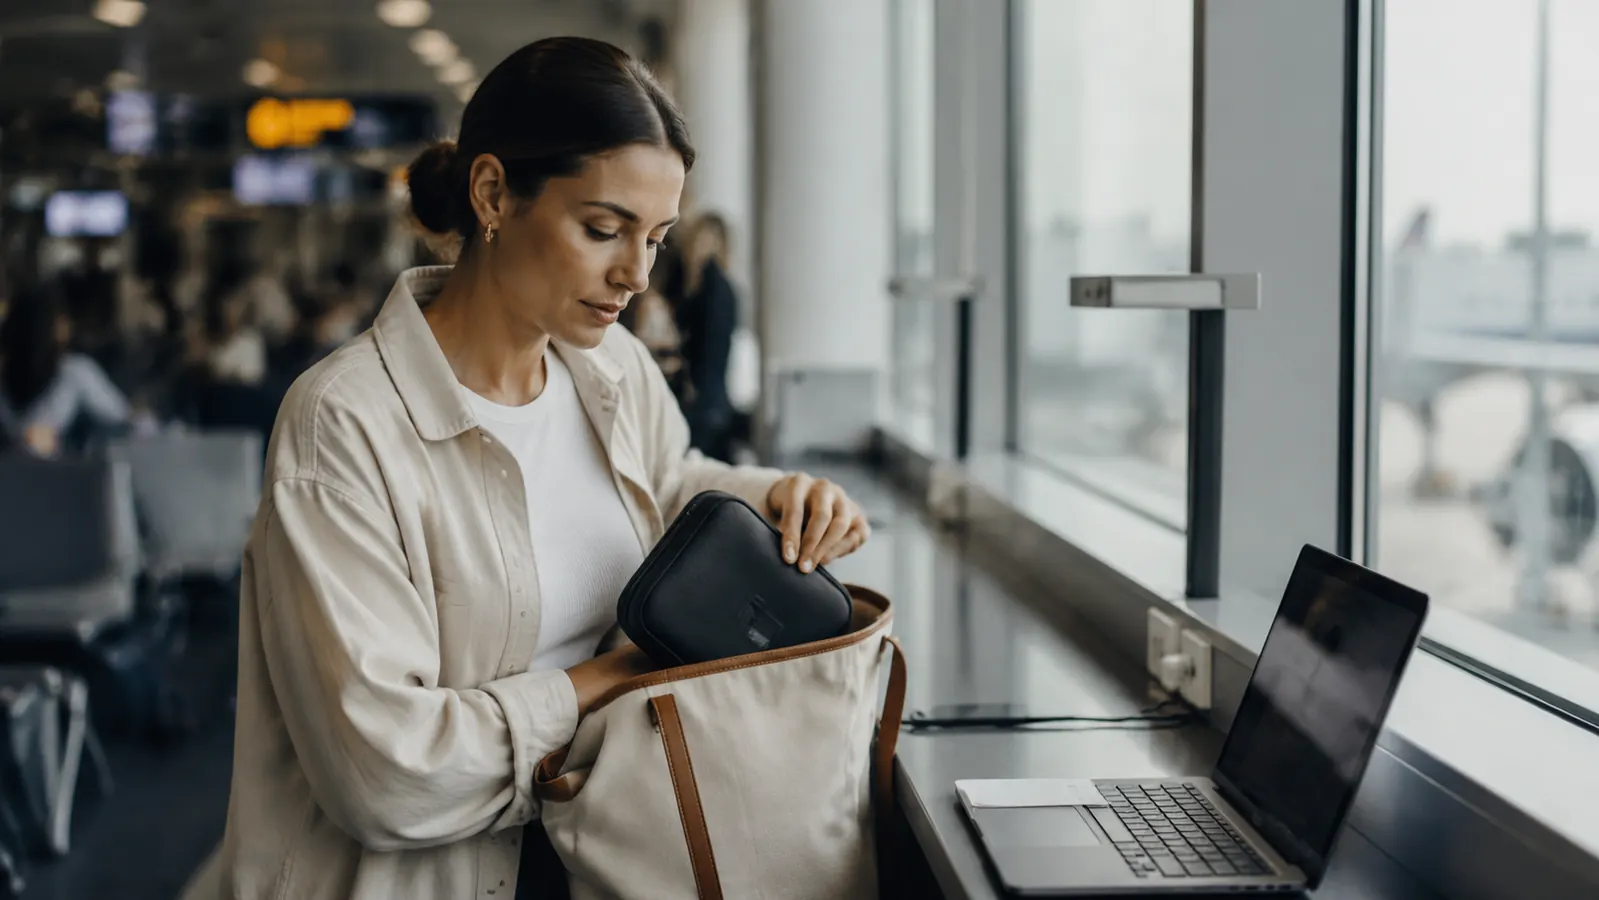
The organizer goes on top, in the most accessible pocket, or in the front pouch of whatever bag you are carrying. On a carry-on roller, I put it in the top exterior pocket alongside my passport wallet and my earbuds. On a personal item, it goes in the front zip pocket. On a daypack, it goes in the pocket I access first when I sit down anywhere.
A cable organizer you have to dig to reach is just a slightly tidier version of the same problem. Accessibility is half the system.
The FYY pouch is slim enough that it fits cleanly into a personal item front pocket without competing for space with your passport, a snack, or your phone. That slim profile is one of the reasons it works so well as a daily-carry organizer rather than a bulky electronics case you avoid pulling out.
Step 5: Repack the Organizer Each Night at Your Destination
The most common way a good cable system falls apart on a multi-night trip is what I call the hotel desk drift. You check in, pull out your charger, plug in, leave the cable on the nightstand. The next morning you wrap it loosely and stuff it back somewhere, not in its assigned slot because you are in a hurry. By day three, the organizer is half-empty, cables are scattered across the room, and you are back to the Denver airport problem in miniature.
Build a one-minute nightly repack habit. Before you go to sleep, pull your cables off the nightstand, coil each one, and seat it back in its assigned slot. Zip the pouch. Put the pouch on top of whatever you are carrying tomorrow. This takes about 60 seconds if your cables are already in the habit of being coiled. It means you wake up with a fully organized kit every single morning of the trip, and you never have to do a frantic sweep of a hotel room to find the charger you left behind a drawer.
A secondary benefit of the nightly repack is that it doubles as a gear check. If a slot is empty that should not be, you know immediately and can look for whatever is missing before you leave the room. I found my USB-C hub on the hotel bathroom counter after a morning repack flagged the empty slot. Without that habit, I would have left it in Portugal.
What Else Helps
A few extras that make the system more reliable over time. Cable ties or velcro wraps help coils stay coiled, especially for longer cables that spring open in the pouch. Short, right-angle charging cables are worth considering for your most-used connection: a six-inch USB-C cable takes up about a fifth of the space of a six-foot one, and for bedside or airplane seat charging it covers everything you need. A small label maker or even a strip of painter's tape with a written letter on each adapter plug is useful if you carry multiple identical-looking charging bricks for different devices. And one spare USB-C cable, kept in a separate pocket from your main kit, is your insurance policy for the one trip where something gets left somewhere.
The FYY organizer has a separate front zip pocket that is perfect for the spare cable and a couple of velcro ties. That pocket is also where I keep my SIM ejector tool and a folded copy of my travel insurance card, neither of which belongs with the cables but both of which need to be findable fast.
If you carry a lot of tech and want more reading on why a dedicated organizer matters even for short trips, I have a detailed breakdown in the 10 Reasons a Travel Cable Organizer Ends Tangled Cord Chaos piece. And if you want to see what two years of daily carry actually does to the FYY pouch, the long-term review covers durability, zipper wear, and elastic strength in detail. For a quick honest take of the personal-use story that got me started on this, read the Denver gate story that finally pushed me to fix the problem for good.
Ready to pack cables like someone who has done this a few hundred times?
The FYY Electronic Organizer is what this entire system runs on. Slim, durable, and purpose-built for travel with multiple elastic loops, mesh pockets, and a no-nonsense zip closure. More than 38,000 Amazon buyers gave it 4.6 stars for a reason.
Amazon Check Today's Price on Amazon →